How to Paint a Poppy in an Line and Wash Style
- alex7036
- Dec 21, 2024
- 5 min read
Updated: Jan 27, 2025
Today’s watercolor tutorial is a special one! We’re going to learn how to paint a poppy in an “Line and Wash" style. The line and wash technique is also known as “ink and wash.”
It refers to a technique where you use a waterproof pen to define clear lines, and fill it in with a beautiful watercolor wash. I love painting in this unique style, and will take you through the process step by step. First you’ll learn how to draw the poppy, then we’ll paint it!
This style can feel intimidating if you aren’t very confident in your drawing skills. But trust me, if you follow the steps in this post, you’ll be amazed at the gorgeous line and wash poppy you can create!
SUPPLIES
Clean Water
Paper Towels
This post contains links which means if you purchase something using one of the links I’ve shared, I will make a small commission at no extra cost to you. Thank you!

How to Draw Poppies
We’ll start by learning how to draw a poppy step-by-step. This particular poppy is going to have a unique wind-blown look where the delicate petals are sweeping at different angles. It may feel a little daunting, but I’ll break it down for you into simple steps.
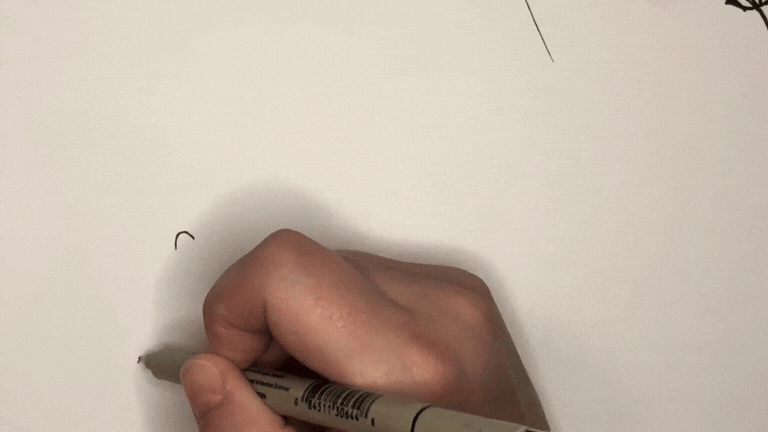
This first step is where we’ll focus on the “ink” part of the ink-and-wash style. Use a waterproof pen for this drawing so that you can paint over it without the lines bleeding.
Petal One
Start by drawing a tiny upside down “u” for the center of your flower. This will act as a guide and will show you where all of the petals should stem from.

Under the “u”, draw a hill shape, with a wavy appearance. Poppies have light and delicate petals, and drawing ruffly lines like this will help create the look we are going for.
Then, draw a squiggly, u-shaped line from the bottom left of the “hill” to about halfway up on the other side.
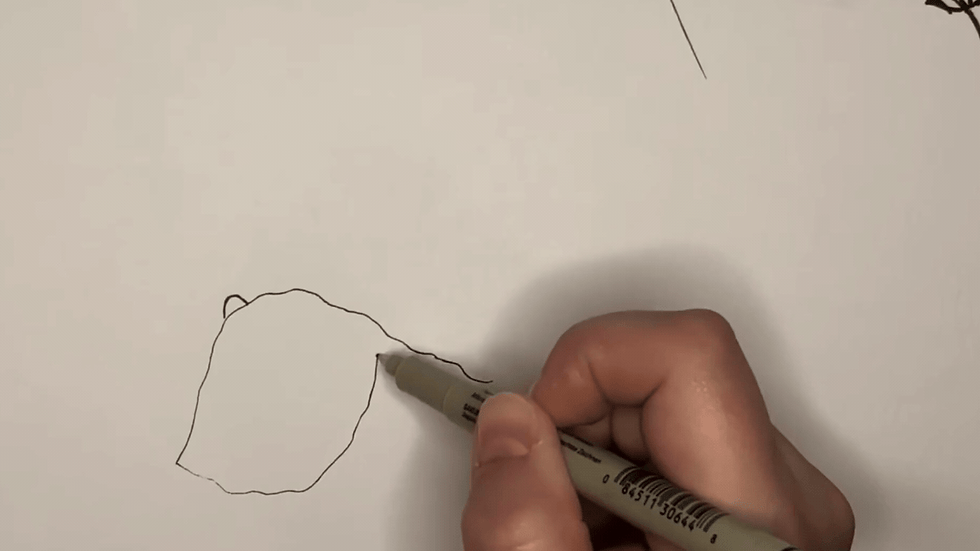
Next, add a wavy line connecting the floating line to the rest of the petal shape. This marks the underside of the petal and helps show the viewer that the petal is turned over.

The highlighted part below is the underside of the petal. I hope this helps you visualize it a bit clearer!

Petal Two
Draw a loop on the left side with a tail that comes down and ends at the center of the flower.

Next, draw a curved line starting from the tip of this second petal and wrap it down to touch the first petal. This helps the flower appear more three dimensional and gives it a sense of depth.

Petal Three
Starting from the right side of the center of the flower, bring your pen up and around in a ruffly ‘’mitten” shape.

Tip: If you create a divot like this one in your drawing, connect the lines to add some dimension and realism to your art! This makes it appear as if the tip of the petal is folding over.

Now, we’ll create another fold in the petal by drawing a wavy line connecting the base of the “mitten” to the thumb. Now,the petal appears to be folding over itself!

Petal Four
This petal is the easiest since it is the farthest back and pointing away from us. All you have to do is create a ruffled line between petals two and three!

And that’s a drawing of a wind-blown poppy, my friends! I bet you’re feeling more confident in your drawing skills already!
The final step is to add some detail to the petals by adding contour lines. Poppy petals are like tissue paper and adding some waviness to the contour lines will help depict this in your drawing.
Add lines that radiate out from the center of the poppy and ones that come in from the edge of the petal. Make sure to follow the shape of the petal for a more realistic look. These are contour lines and can add an expressive element to your drawing.

Painting the Poppy
Now it is time to bring this poppy to life! Start by painting a layer of water to one of the petals of the poppy. This acts as a base for the watercolor paint to flow. Don’t put too much water on the petals, but have enough to make them glisten on your paper. It should have a nice even sheen to it without any excess puddles of water. If you find there’s too much water on your paper, you can always use a dry brush or paper towel to pick it up.

Next, drop some red paint at the base of the petal, and watch the magic happen. The water will carry the paint and do most of the work for you!

Sometimes, the paint might not flow exactly as you expected. To get a seamless look, blot your brush with a paper towel so that it’s damp and stroke back and forth along any harsh lines to encourage them to blend nicely.

See how much more visually appealing the petal looks after blending the paint?

Adding Final Details
Now it’s time to get into the details to transform your piece into something exceptional!
Contour lines
To make the contour lines stand out, grab some more concentrated red paint and create rippled lines along the petals.

Adding Shadows
Next, we’ll add some shadows using a watercolor technique called glazing. Glazing is another term for layering. This concept is key in making your paintings look more realistic.
Grab a more concentrated mixture of red paint and start to add shadows to the areas where the petal is folded over or in shadow.
I know that shading can feel intimidating, but the best way to break it down is to observe shadows and highlights in real life. Shadows are darkest closest to the line that separates them from the light source, so you’ll want your poppy shadow to be darkest right where it folds.
Note: Perfecting shading and highlighting comes with practice. It’s ok if you still don’t quite understand more complex techniques like this. Just keep observing, keep painting, and keep learning through tutorials like this one!

Continue to add layers to the other areas where a shadow would be cast. Here I’m adding shadows to the undersides of the petals and the petal that is furthest away from us.

If you want more insight on watercolor glazing and layering, here’s a snippet of the full video tutorial for visual reference.
Adding the Stem and Leaves
Now for the finishing touches – the stem and leaves! Add some greenish brown pigment to your brush and paint a simple stem coming from the center of your flower.
Poppy stems are fuzzy, so let’s add that detail to this stem. All you have to do is create small tick marks with the paint brush going towards the stem at an angle while it’s still wet.

Leaves
To help me make my leaves more symmetrical, I like to start with the centerline of the leaf. This gives me a good starting point to go off of. Go about halfway down the stem and paint your leaf’s centerline.

The leaves on a poppy are long and pointy. Starting from the stem, paint lines that have multiple sharp edges. Here, I freehanded the leaf, but you can start by drawing your leaf in ink to give the painting a cohesive line-and-wash look.
And there you have it! Your first “Line and Wash” style poppy!

Were you surprised by your amazing poppy-drawing abilities? Once you break down more complex paintings into their fundamental shapes, it’s not so overwhelming after all!
If you want more fun tutorials, check out my YouTube channel where I share step-by-step video tutorials like this one!
And if you want to dive deeper into the world of Line and Wash, I have a comprehensive guide available on my website!

Happy painting,
Alex


The thing I have come to realize as we struggle is that not one of us would know the hidden talents that we have unless we try something new.